3 Using DMPTool
3.1 Log into your DMPTool account and view your personal dashboard
Go to the DMPTool website, and select the option to sign in via the institutional portal:
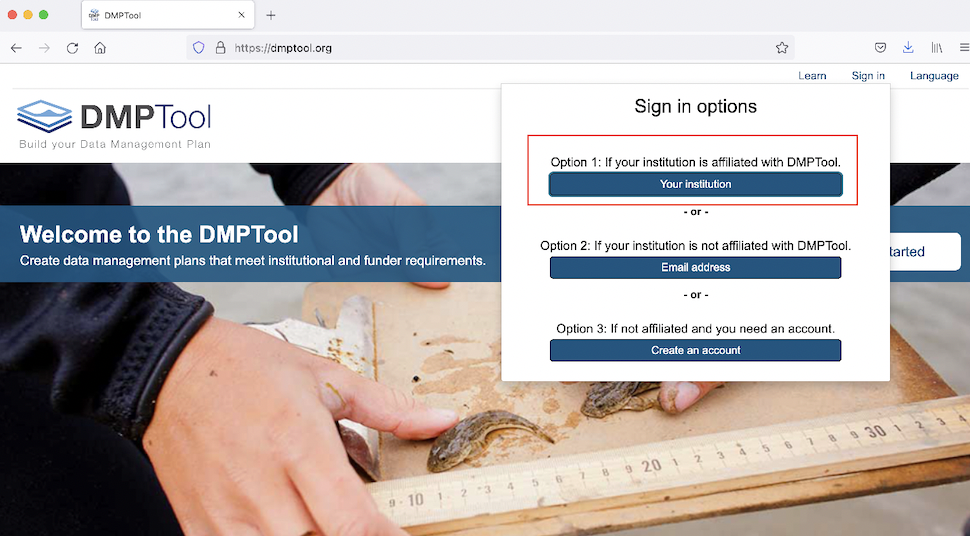
Figure 3.1: Sign into DMPTool via your institution
Then, select University of Colorado, Boulder; once you click Go, you will be able to sign in via your Identikey:
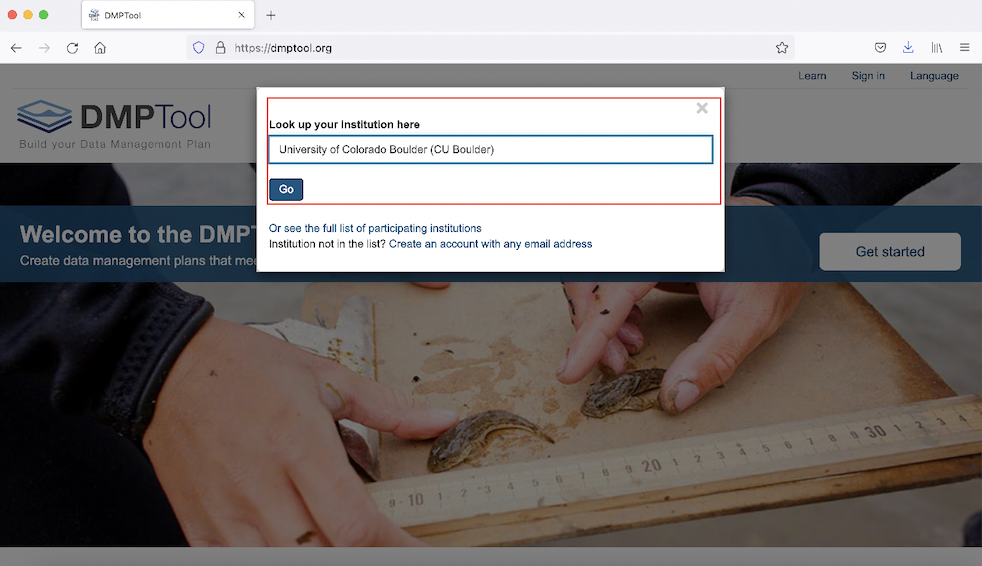
Figure 3.2: Look up CU Boulder and click ‘Go’ to sign in via IdentiKey
This will bring you to your personal DMPTool Dashboard (Figure 3.3). Here, you can begin a new plan; resume working on a saved plan (in-progress plans will show up under the My Dashboard sign if they exist); or view sample plans created by other CU researchers for a variety of funding agencies (under the banner that reads University of Colorado Boulder Plans)
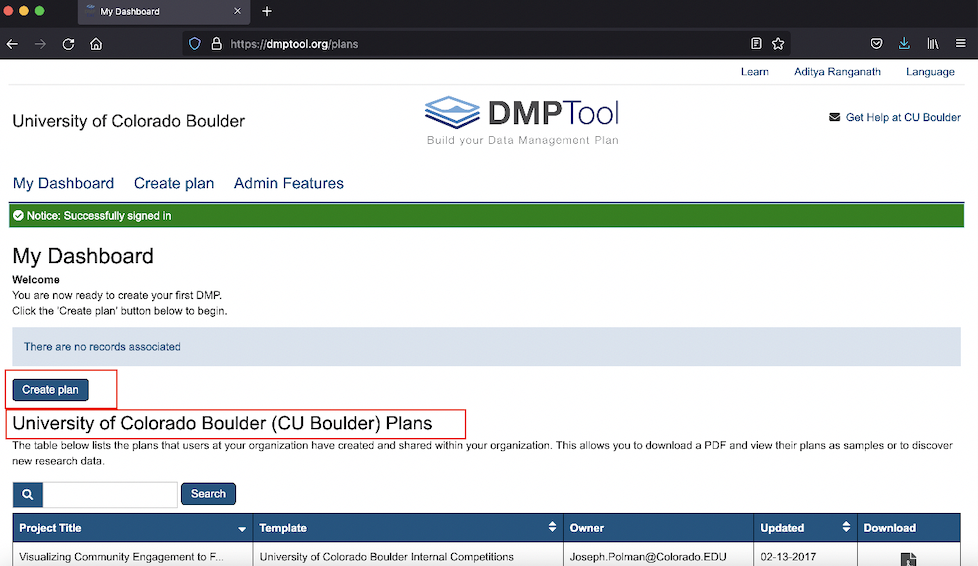
Figure 3.3: Your personal DMPTool dashboard
3.2 Create a new plan
To initiate a new plan, click the blue Create plan button (see Figure 3.3 above), which will bring you to an interface like the one below (Figure 3.4). Here, you can provide relevant details about your project, such as its name, the funding organization, and the plan template that you would like to use. In this example, we’ve named our project “Demonstration”, and have selected “National Institutes of Health” as the funding organization. Because there is only one NIH DMS Plan template, we do not need to explicitly select a template (as we would for a funding agency with multiple templates, such as the NSF); selecting “National Institutes of Health” as the funding organization will automatically load the NIH template once you select “Create plan”.
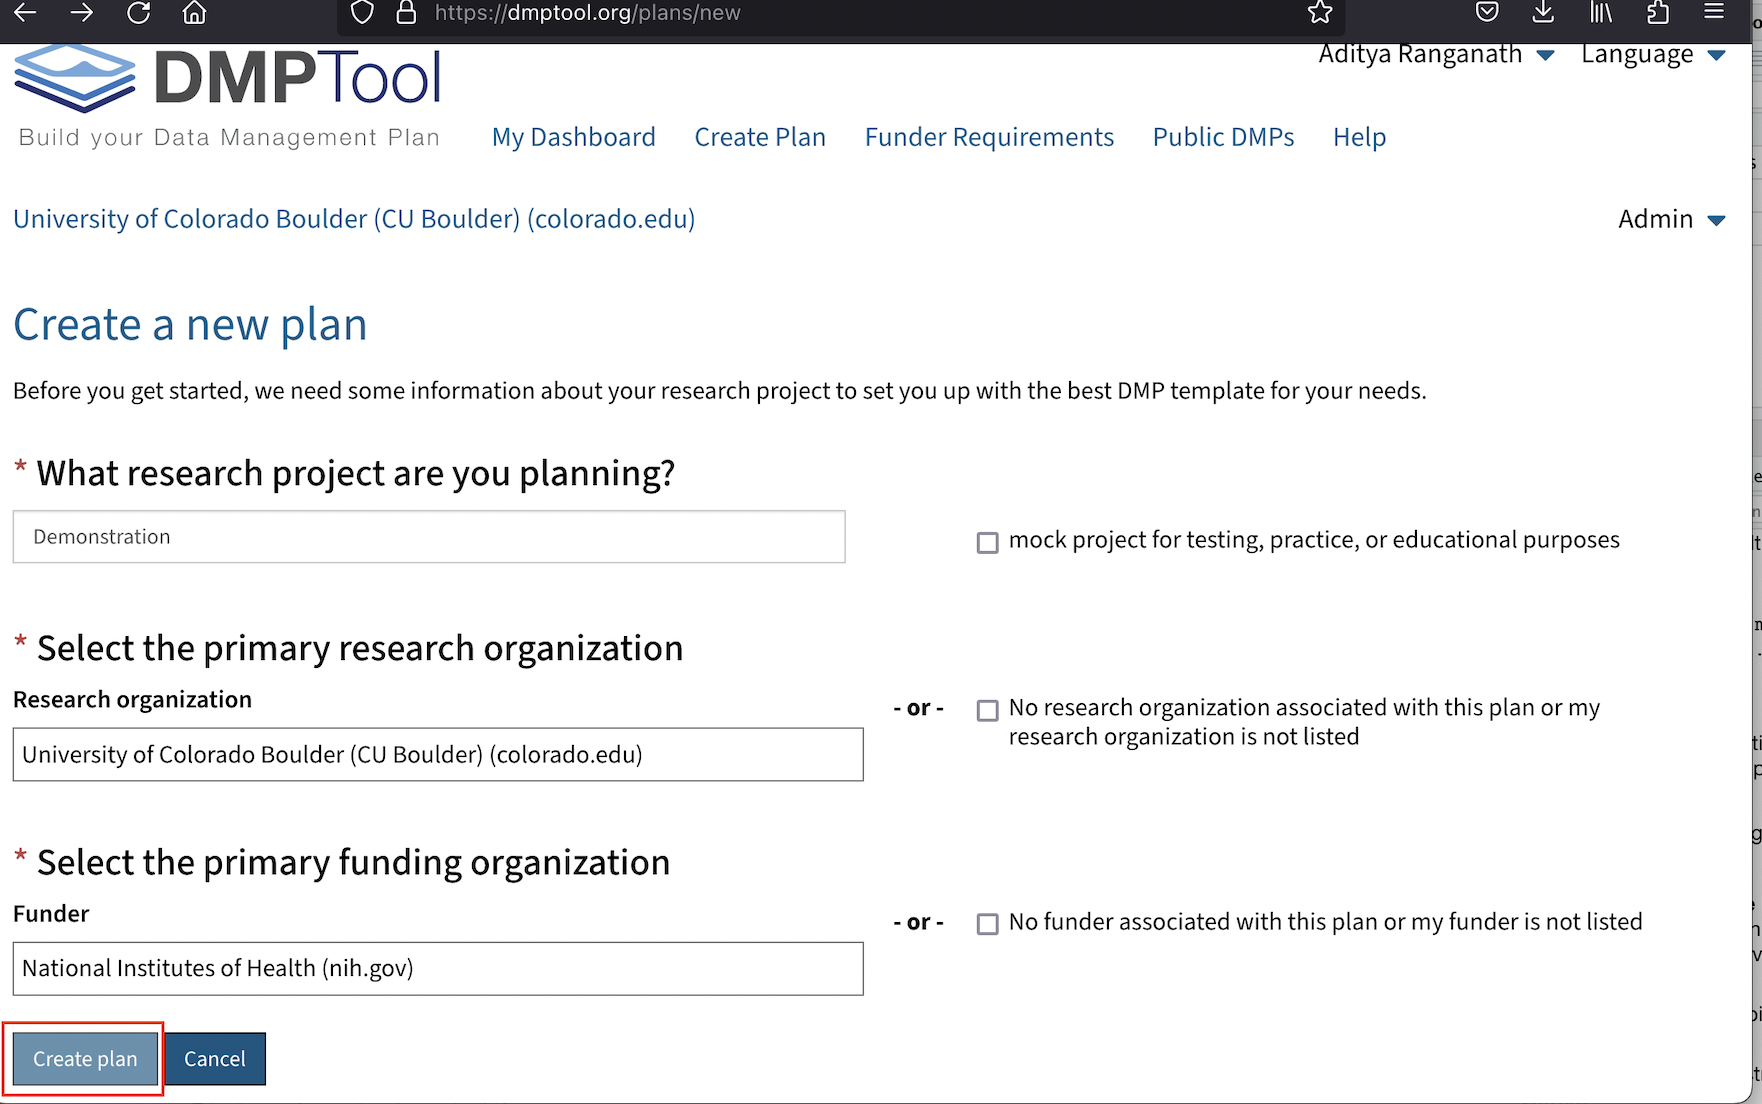
Figure 3.4: Initiate a new plan
3.3 Customize, Write, and Compile the Data Management and Sharing Plan
At this point, we are on a page that looks something like the one below (Figure 3.5). Note the six tabs running along the top of the page. By systematically working through the various sections associated with these tabs, you will be able to generate a Data Management and Sharing Plan based on the NIH template. Make sure to save your work on the sections as you go. Also, note the Select Guidance section on the right. Make sure that both the DMPTool and University of Colorado Boulder (CU Boulder) buttons are selected. This ensures that as you work through the material within the Write Plan tab, you will be able to see relevant guidance on how to complete various sections of your DMS Plan. In the first tab, Project Details, you can enter your project abstract and some additional information.
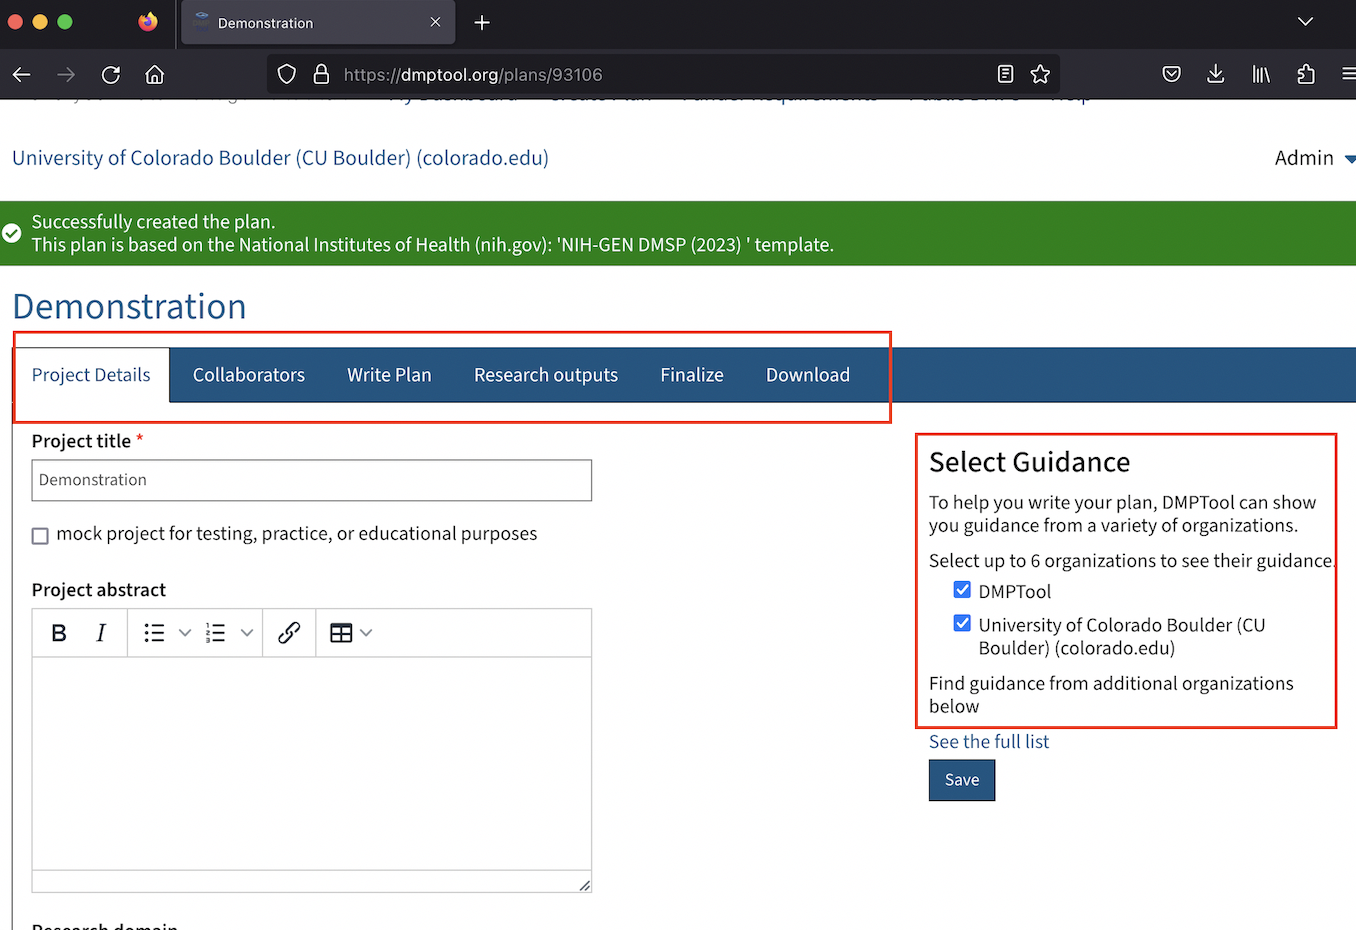
Figure 3.5: Environment to assemble plan
The second tab, Collaborators, will look like the image below (Figure 3.6); here, you can invite collaborators to participate in creating the DMS Plan, and regulate their access to the in-progress document.
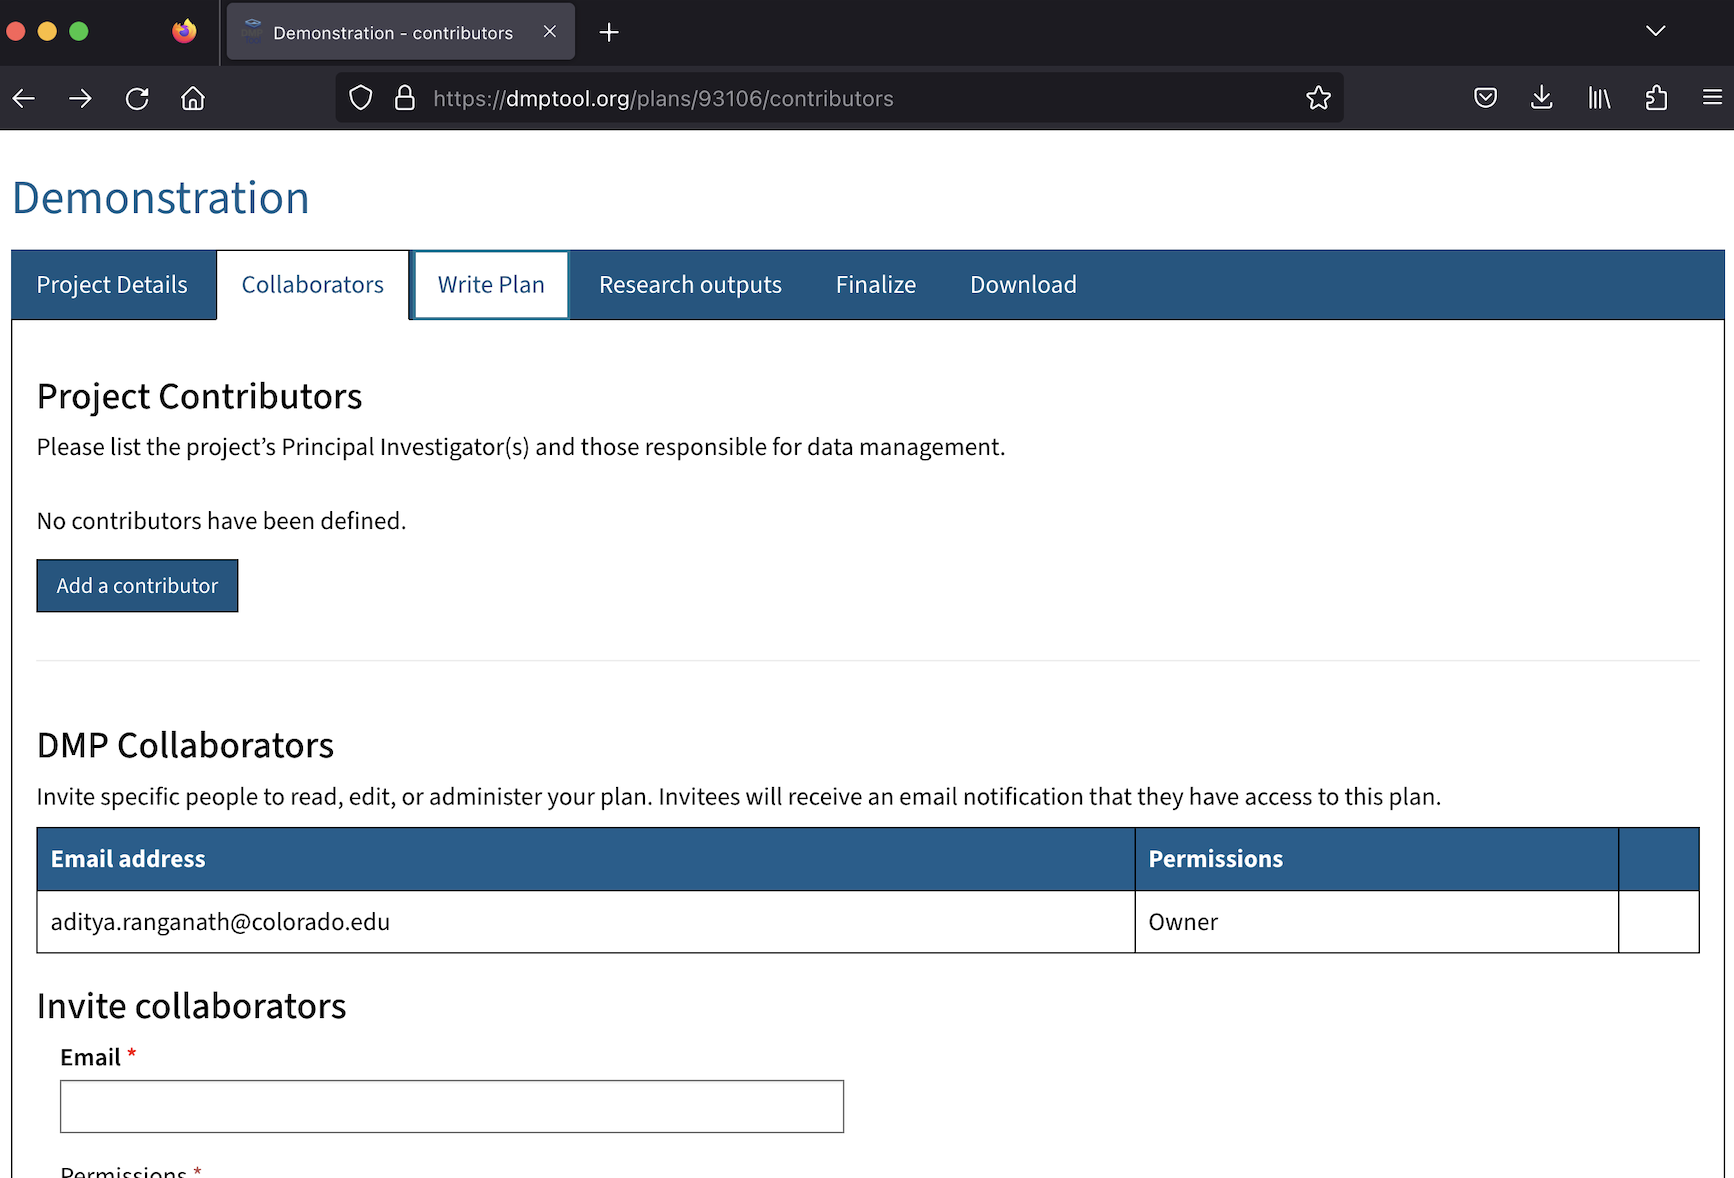
Figure 3.6: Add collaborators
Once you’ve invited collaborators (if relevant) and set their permissions, you can click the Write Plan tab, which will bring you to a page that looks like the one below (Figure 3.7). Each section on this page corresponds to a required section of the NIH Data Management and Sharing Plan. Click the + to expand a section and work on it, or click expand all to open all the sections at once.
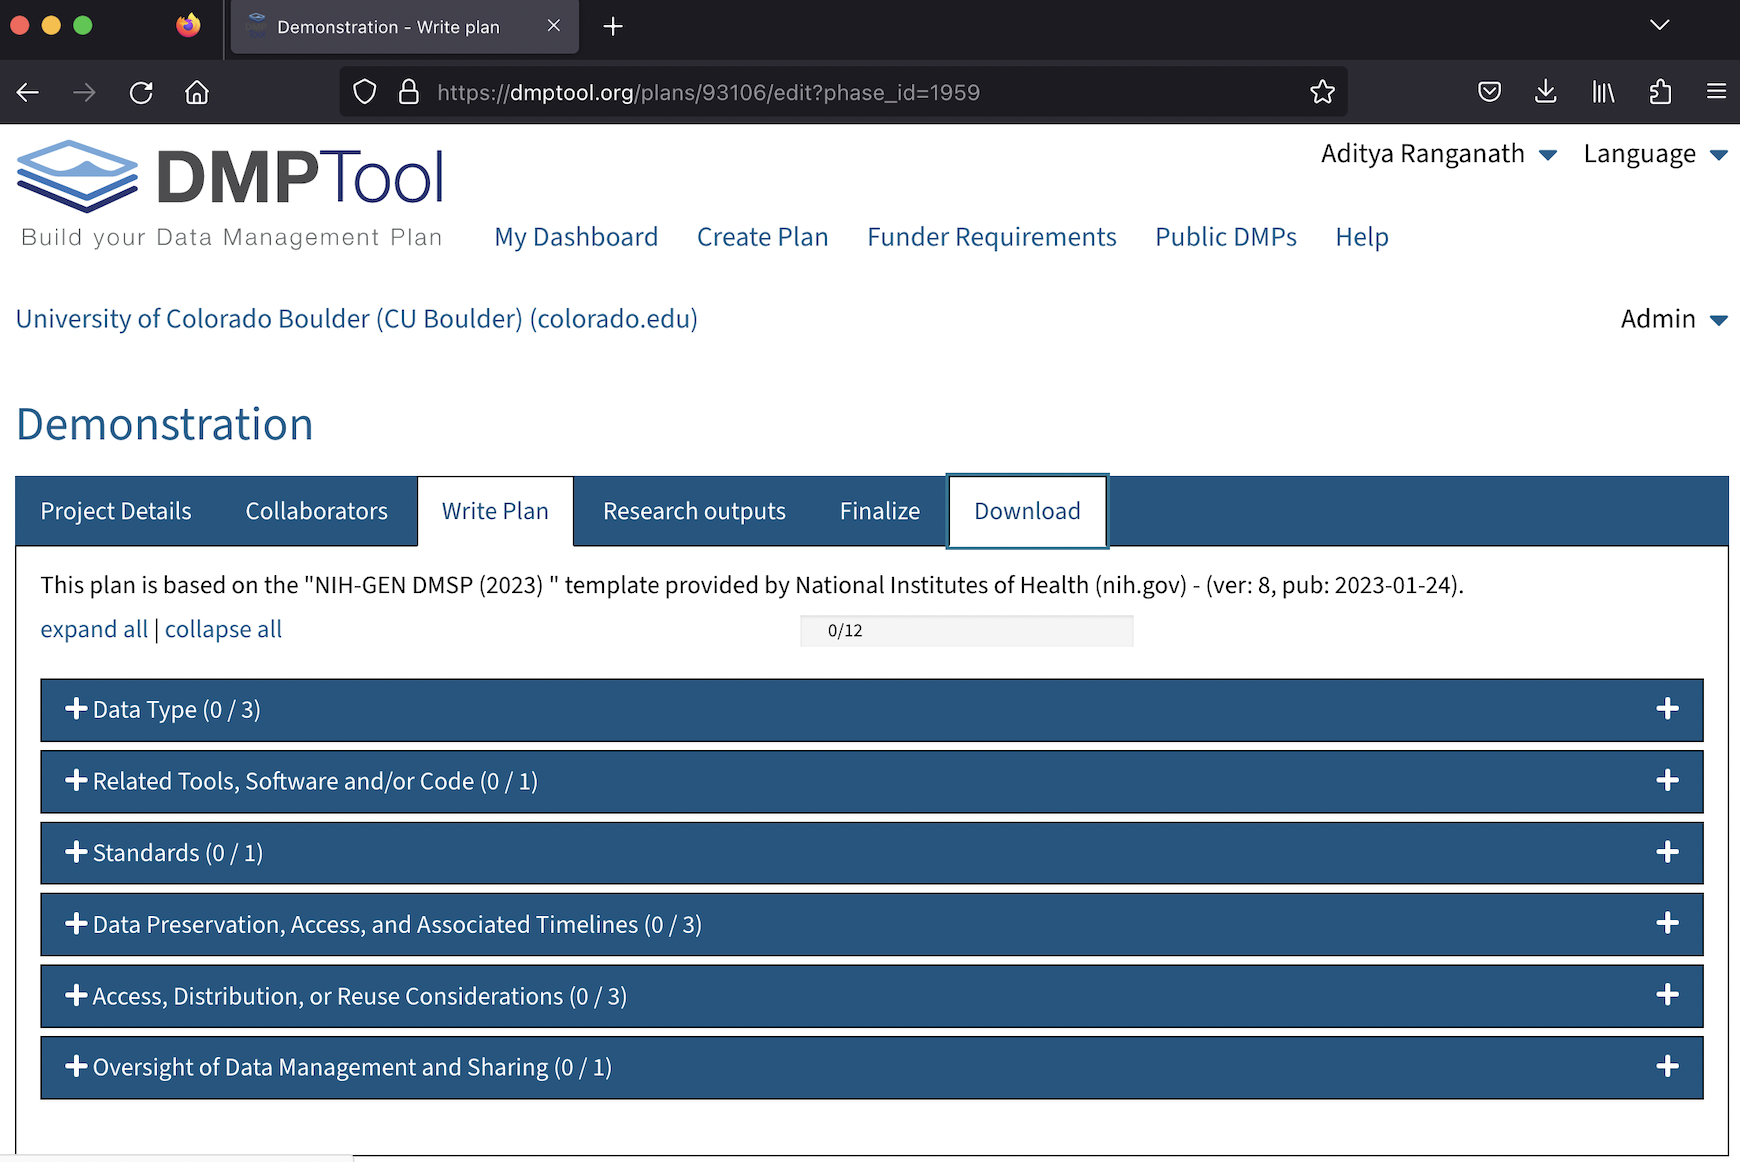
Figure 3.7: Write plan sections
To take an example, let’s expand the Data Preservation, Access, and Associated Timelines section, which will look like the image below (Figure 3.8), once it is open. We can write (or paste) relevant text for this section into the text box, and click Save (note that it’s necessary to click Save after you complete each plan section within the Write Plan tab). To the right of the text box, you can view relevant information on the chosen section or advice on how to complete it. To view this information, make sure that the Guidance button is selected (when selected, it will appear white). Once the Guidance button is selected, you’ll see buttons corresponding to different sources. To see instructions from the funding agency (here, NIH) or DMPTool itself, click on those buttons. To see CU Boulder-specific information on completing a given section (i.e. information on CU-specific resources or tools that might be relevant to a given section), click the CU Boulder button.
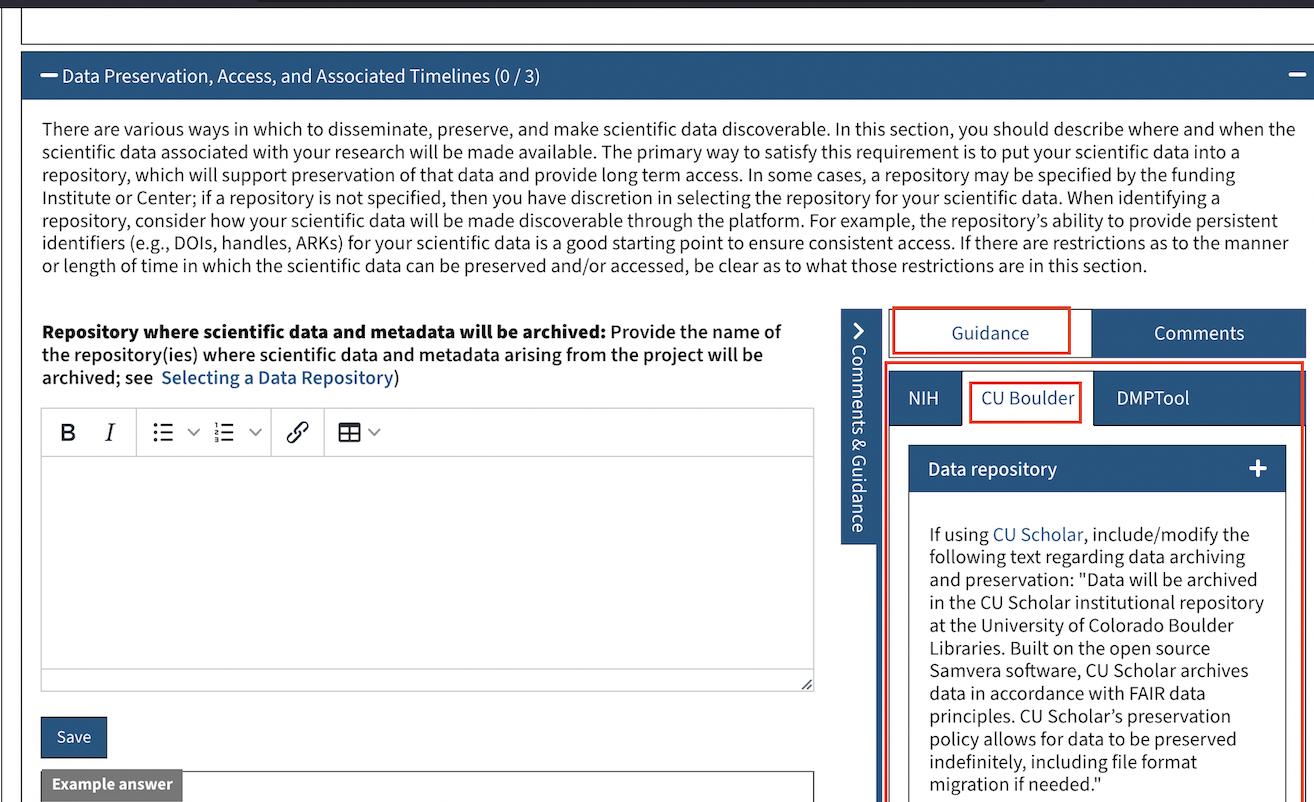
Figure 3.8: Completing an individual section within the ‘Write Plan’ tab
3.4 Download and Export the DMS Plan
After completing the various sections of the Data Management and Sharing Plan within the Write Plan tab, and adding relevant information within the Research outputs tab, you can download your plan (which is compiled from the information that has been entered in the various sections of the Write Plan tab), within the Download tab. When open, the Download section will look something like the image below (Figure 3.9). Note that it is essential to ensure that the document you submit to the NIH adheres to all formatting requirements. The download specifications used below are consistent with these requirements, but please see official NIH guidance on formatting for additional information. This document from Columbia University also provides additional useful information on formatting. After customizing the plan according to the required formatting specifications, you can click the Download Plan button, at which point the DMPTool software will generate a complete and formatted data management and sharing plan in the desired file format (in this case, PDF), based on the text that was entered in the various sections we discussed above.
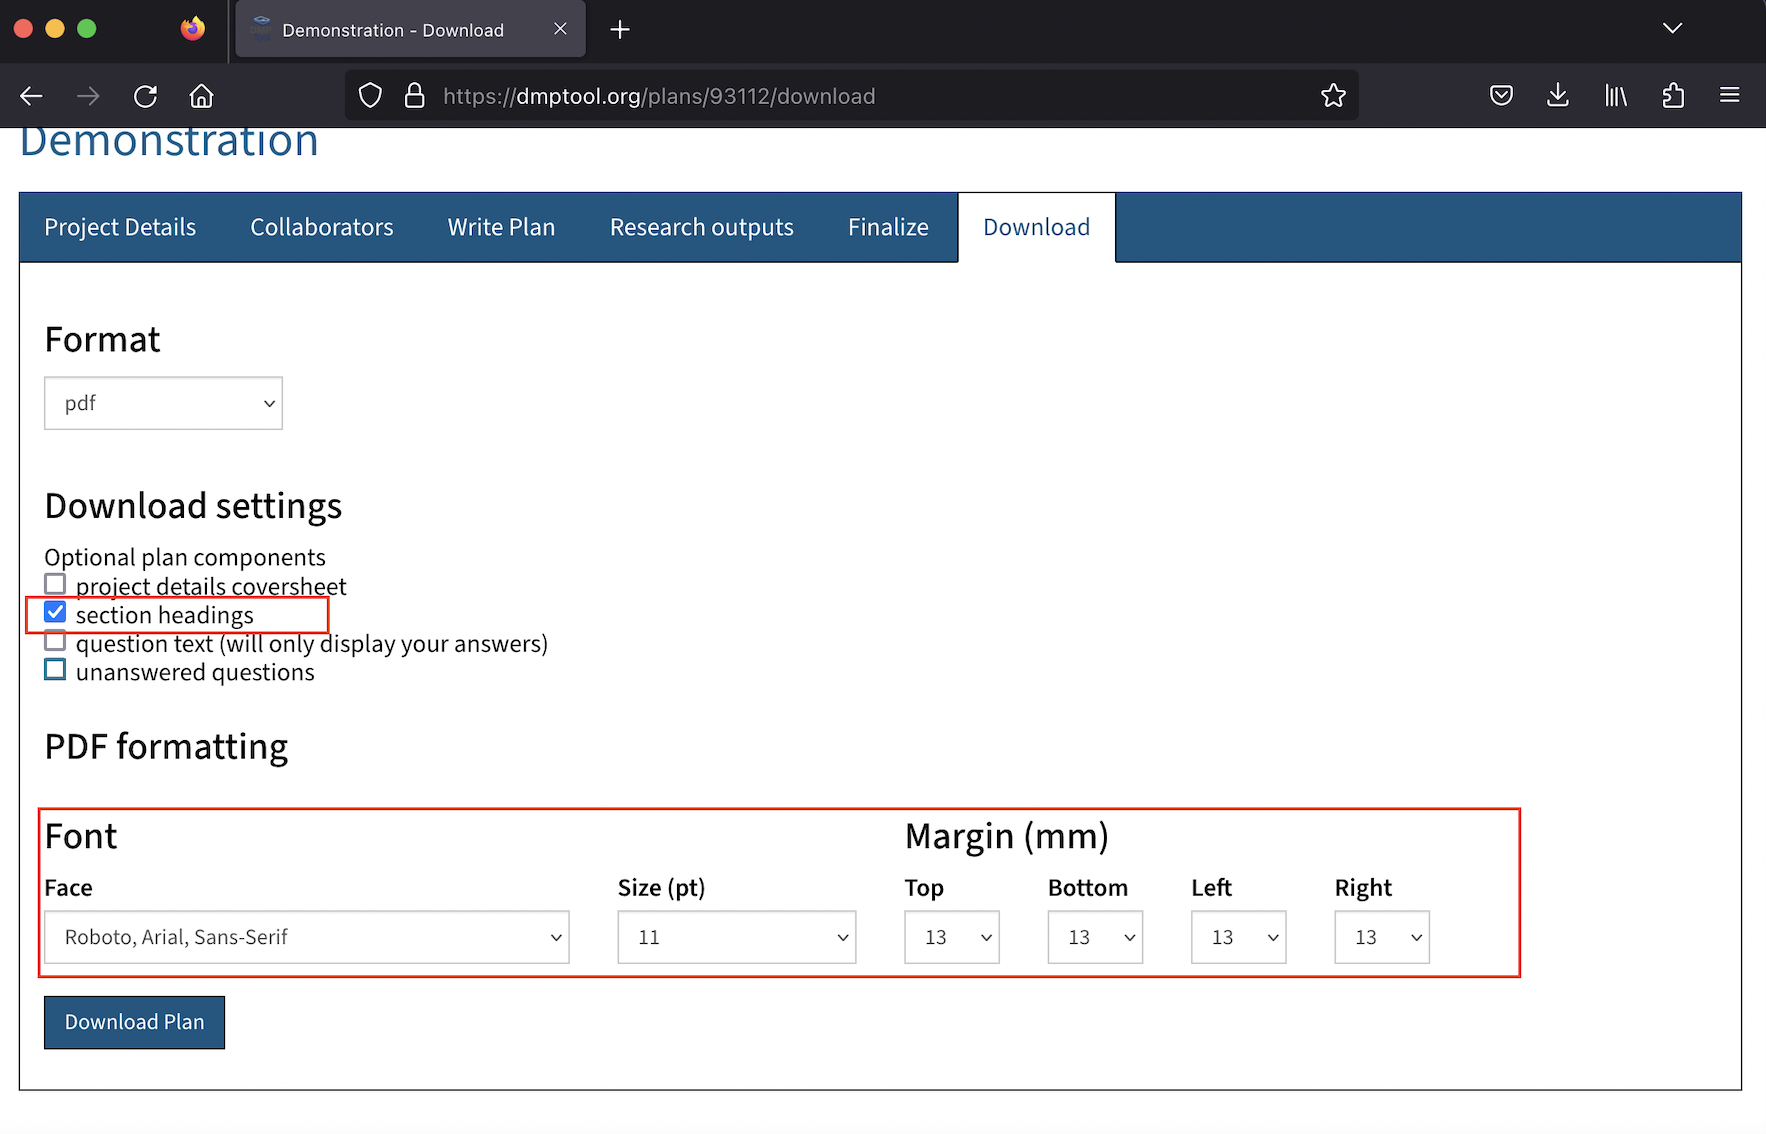
Figure 3.9: Download plan
3.5 Have someone review the draft DMS Plan
After generating a draft Data Management and Sharing Plan using DMPTool, it is often useful to have someone review and offer feedback on your draft. In particular, we encourage CU researchers to reach out to us at the Center for Research Data and Digital Scholarship; we are able to review DMS Plans, and offer advice on possible revisions before you submit the plan to the NIH. To set up an appointment with a data management specialist at CRDDS, please send an email to crdds@colorado.edu.
3.6 Revise the DMS Plan
When you are ready to implement revisions and finalize your plan, you can access your in-progress plan (and its various sections) from your personal DMPTool dashboard (see Figure 3.10 below). Simply click on the relevant project title, and DMPTool will take you back into that project’s plan, where you can implement necessary revisions to the relevant sections, and then download the revised DMS plan in the same way we downloaded the initial draft:
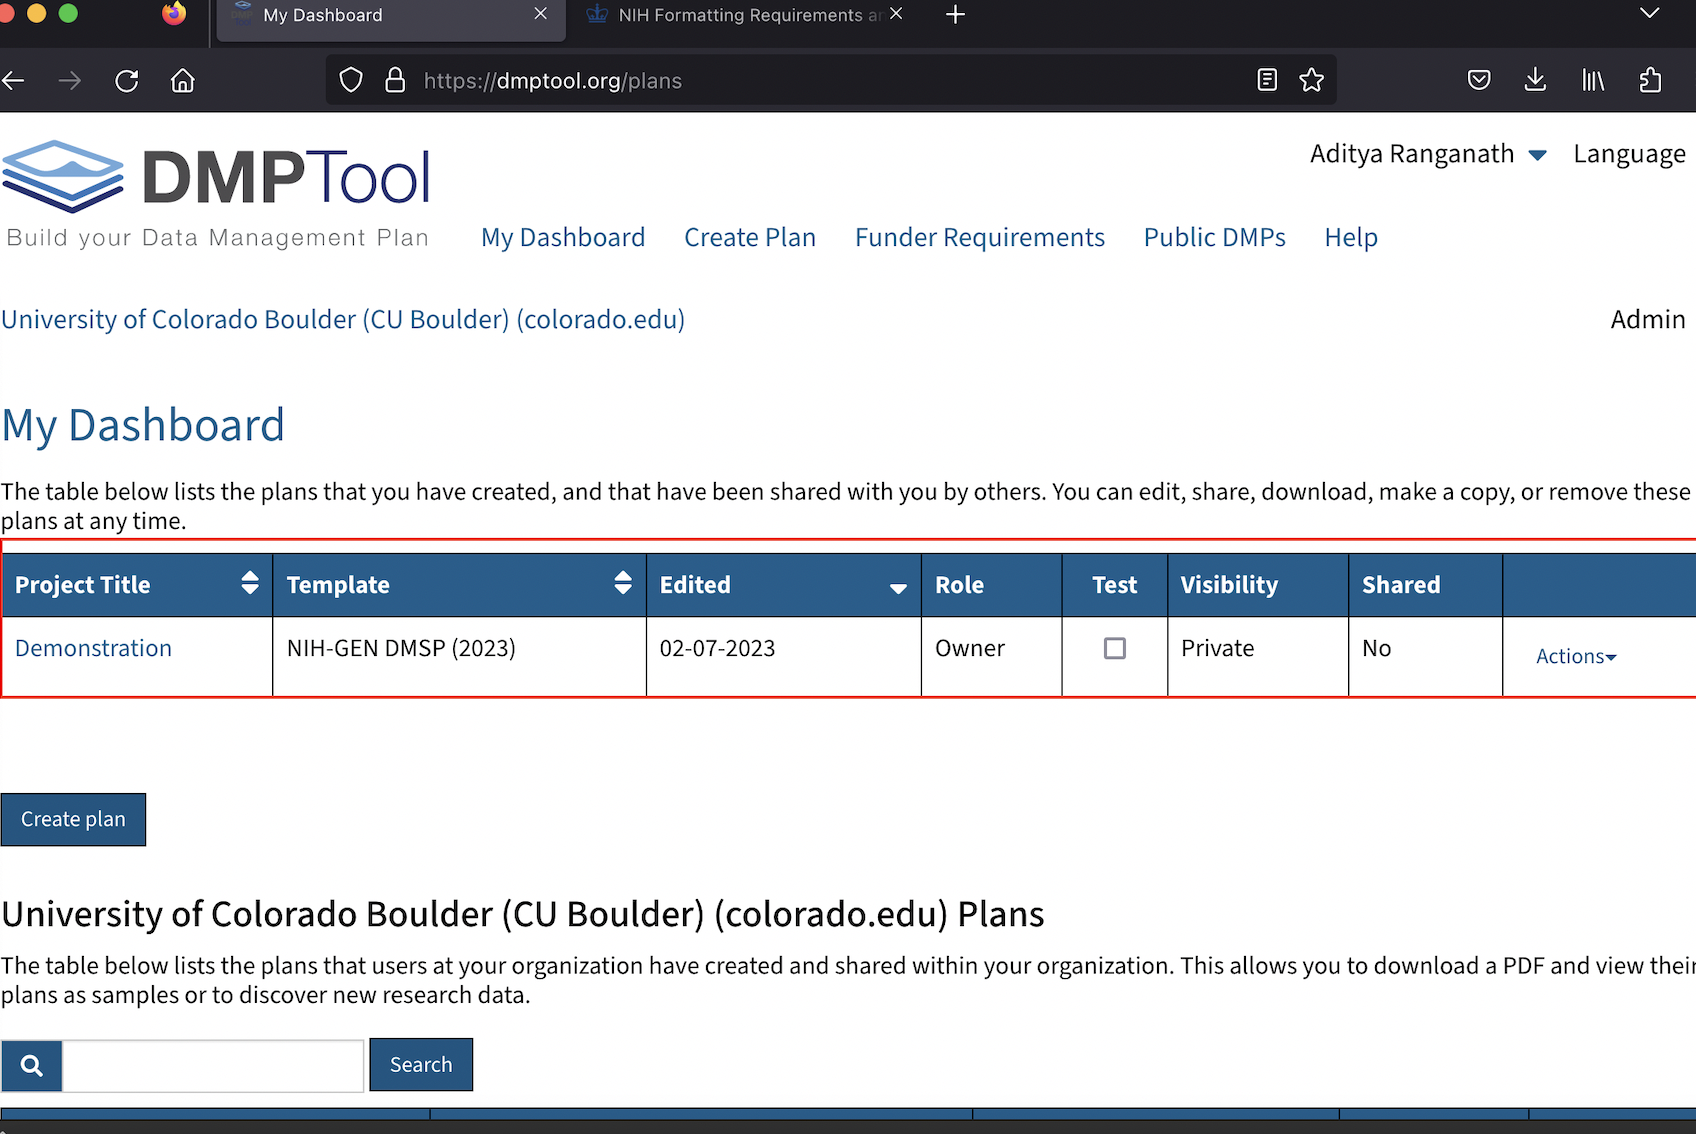
Figure 3.10: Access plan from dashboard to make revisions
Also, note that it’s not necessary to complete the plan document in one session; so long as you save the DMPTool sections as you go, it’s always possible to return to an in-progress or incomplete Data Management and Sharing Plan from your dashboard, and continue working where you left off.
3.7 Submit the DMS Plan
While the specific submission process for the plan will depend on the NIH’s instructions for your particular grant, it’s worth noting that DMPTool provides useful options for publishing and registering your plan within the Finalize tab of your project (including the option to generate a plan ID and add the plan to ORCID), as seen in Figure 3.11 below:
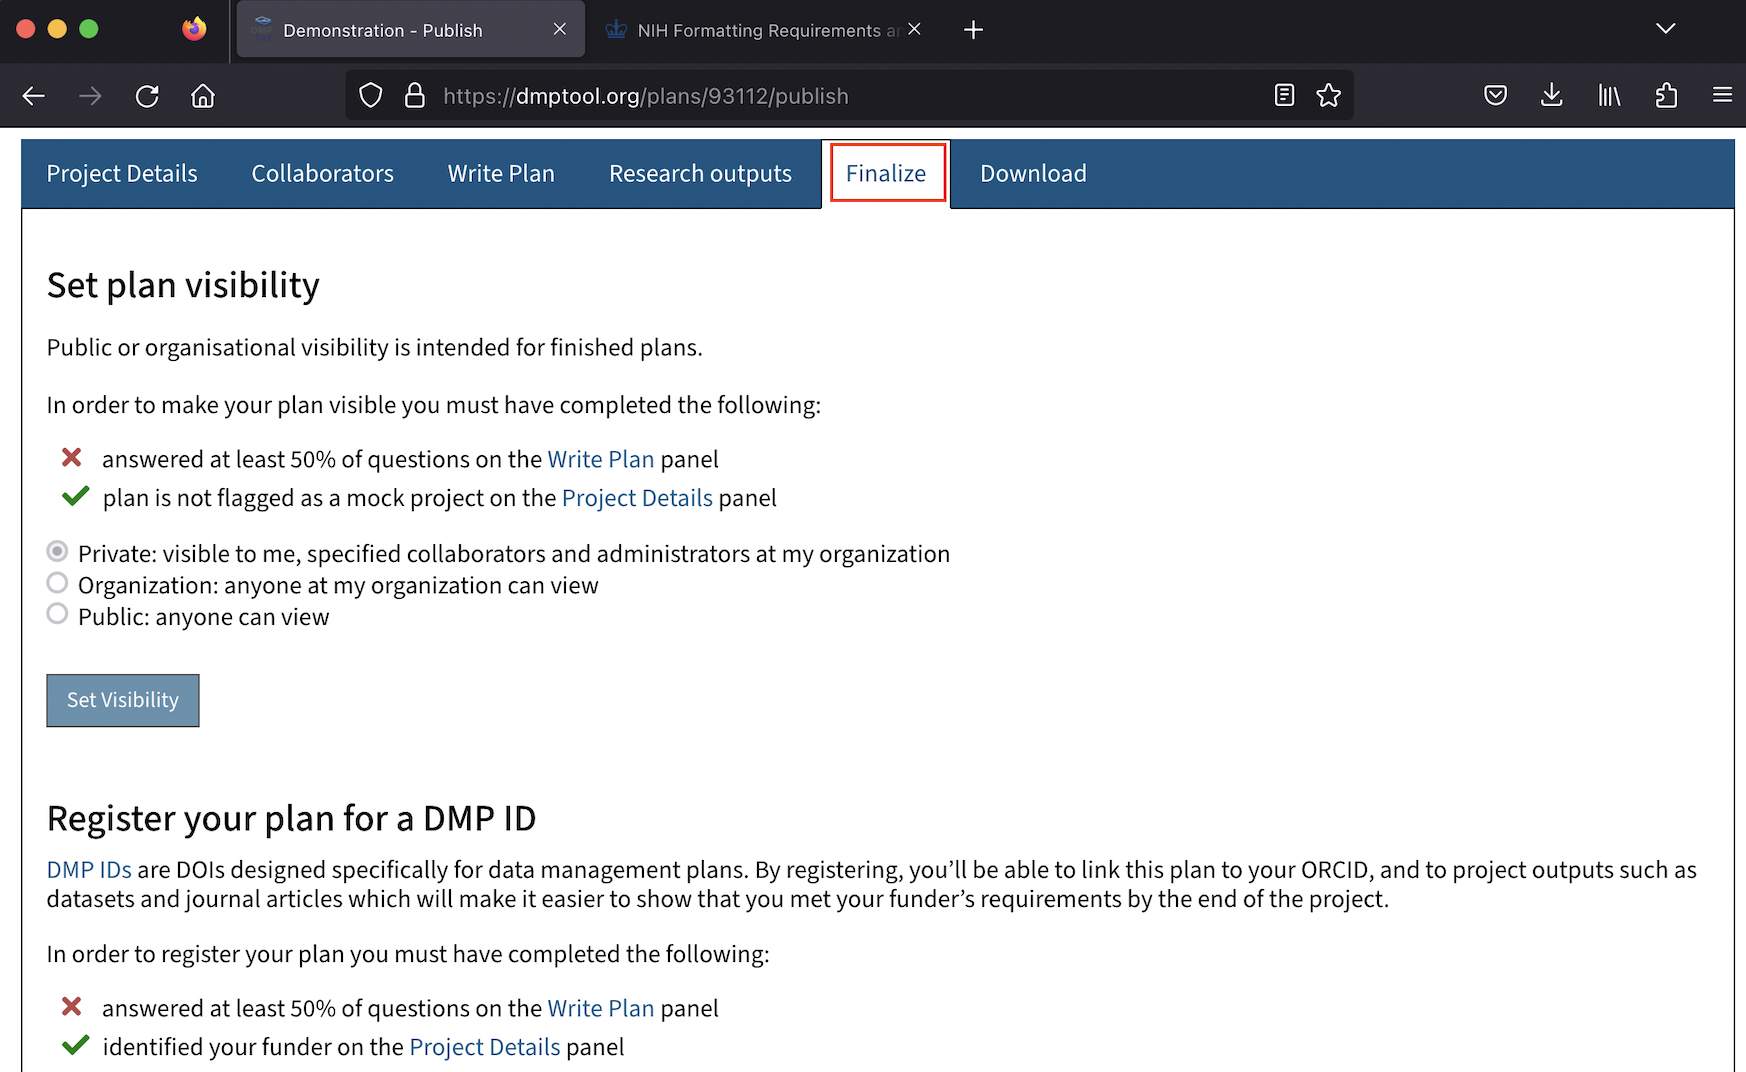
Figure 3.11: Options to publish and/or register your plan