A general workflow for using Git and GitHub
Overview
This guide roughly follows along with the in-class demonstration. First, we will walk through GitHub, then cloning a repository using GitHub Desktop and making changes.
The main point here is to demonstrate the general clone-push-pull GitHub workflow.
Working on GitHub.com
Create a new repository and make changes on GitHub
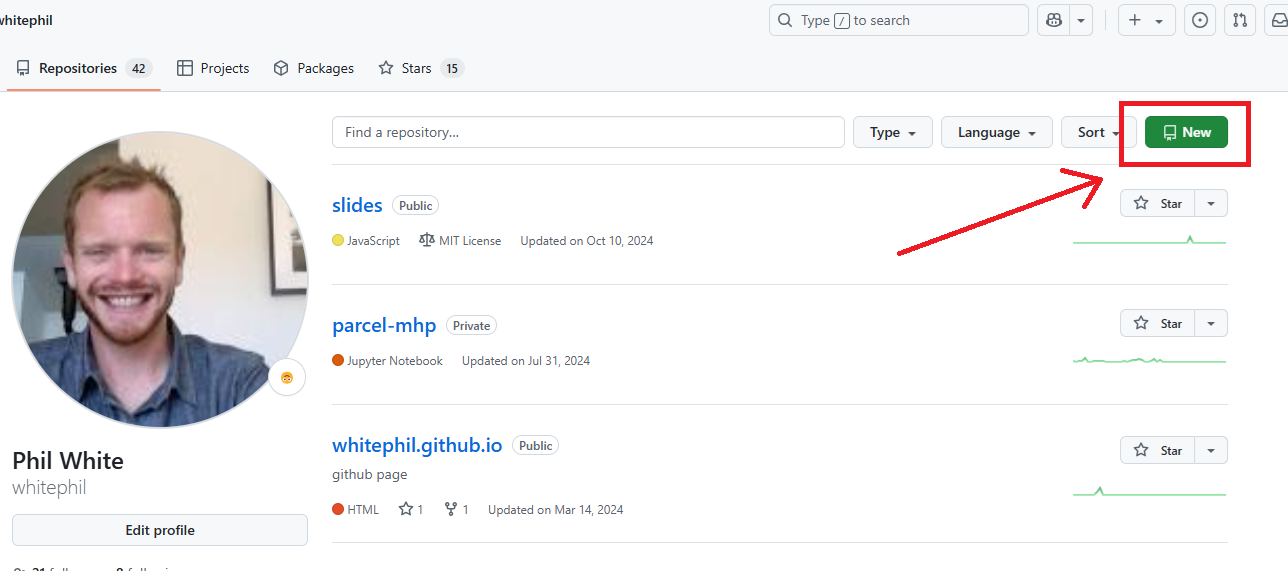
Step 1
From your dashboard on GitHub.com, click the New button.
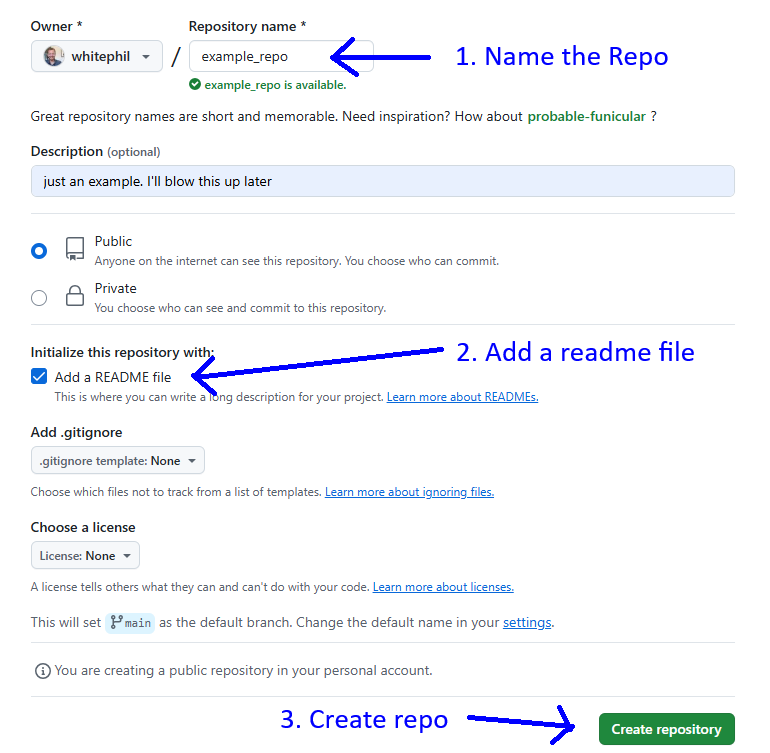
Step 2
- Give the repo a name
- Check the Add ReadMe box
- Click Create Repository
Congrats! You’ve initialized a repository!
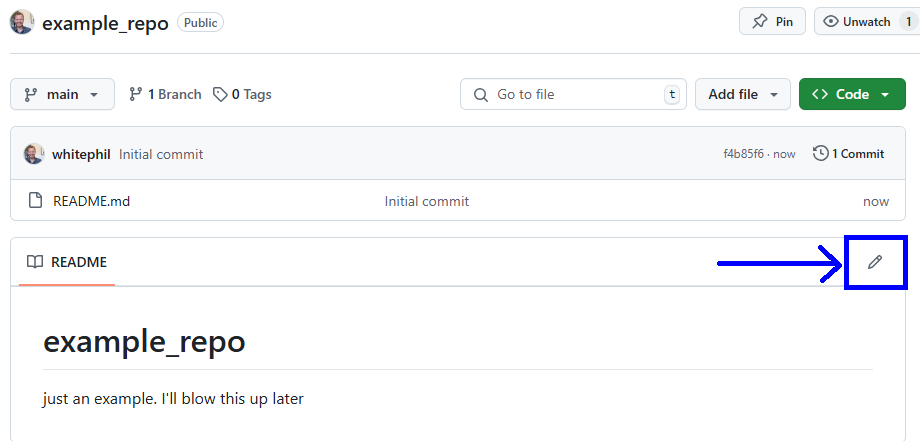
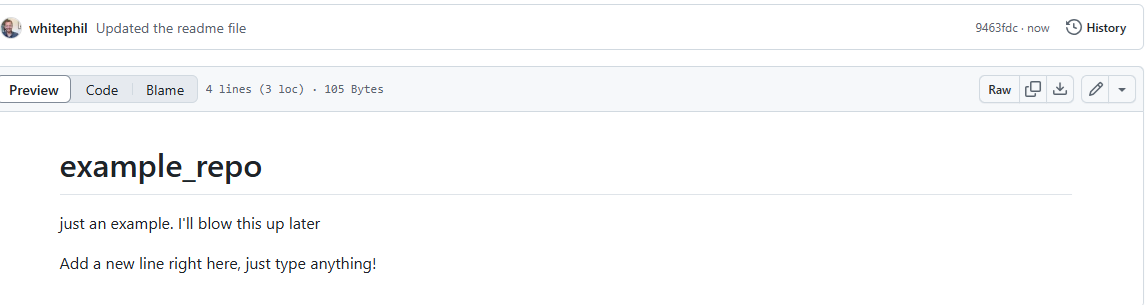
Edit README.md file
Step 1
Click the edit README button.
Step 2
Add a new line to your README, then click Commit. 
Step 3
Add a commit message, and click Commit to save the changes: 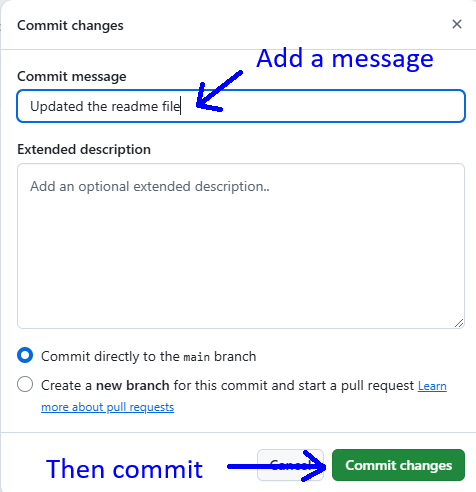
Congrats. You’ve made an edit then committed it.
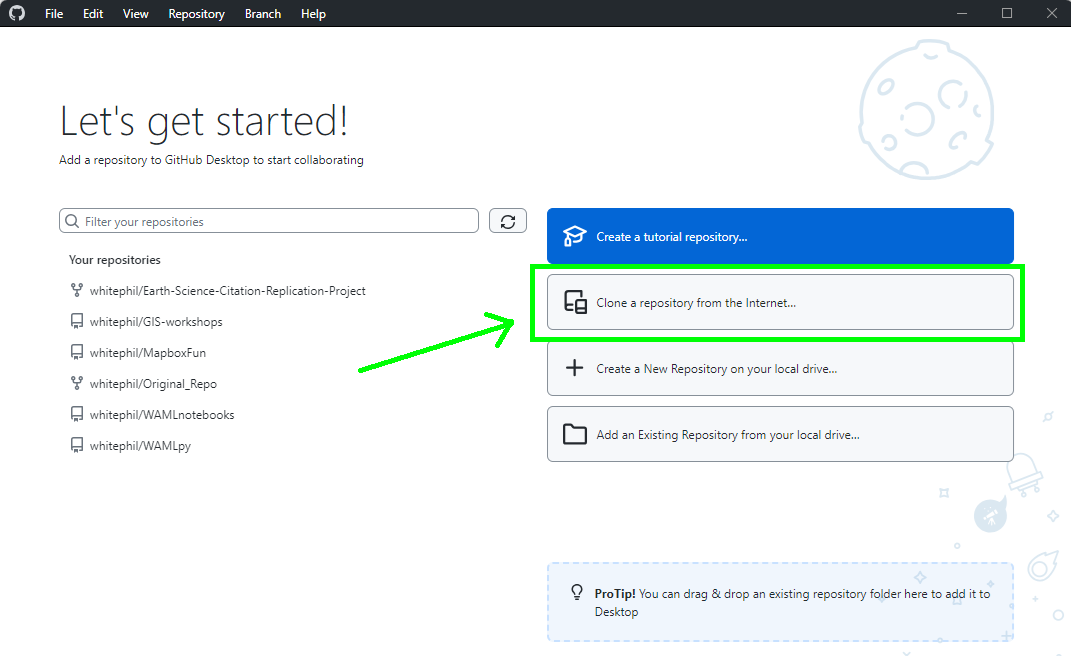
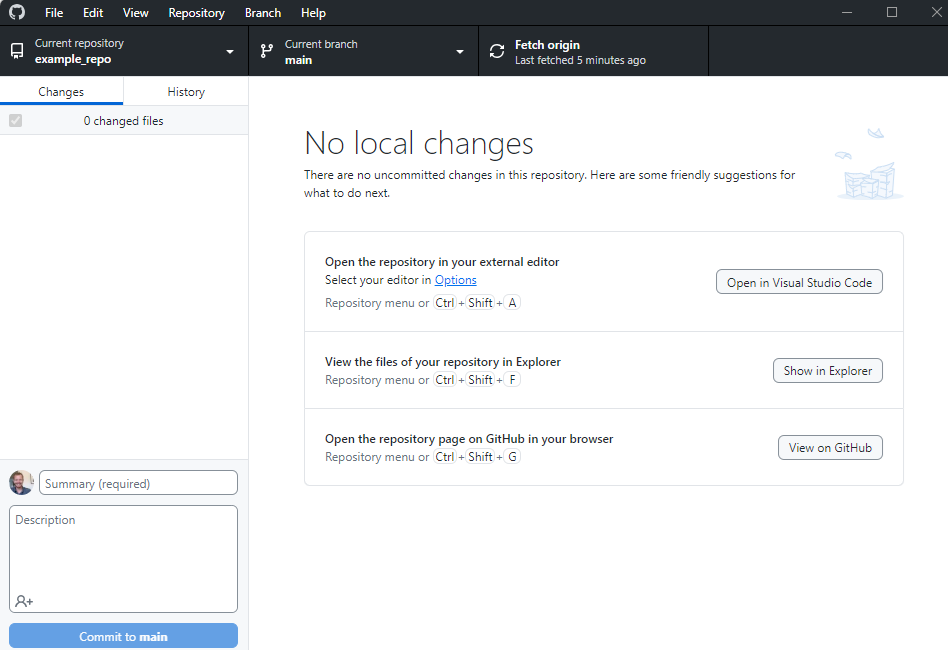
GitHub Desktop Client
First, we’ll clone our repository to the local machine.
Step 1
In GitHub Desktop, click the Clone button:
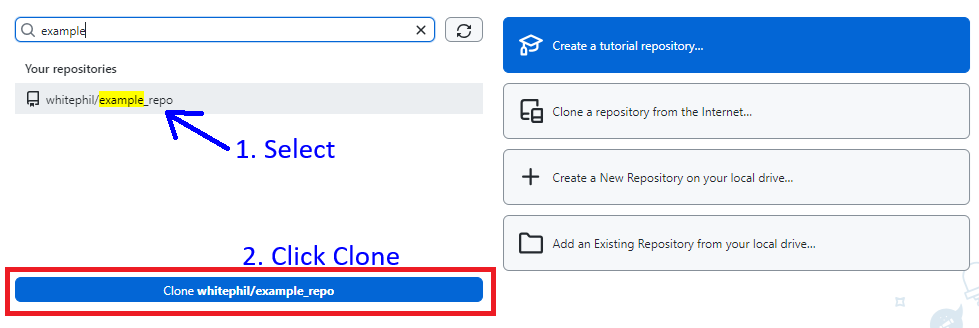
Step 2
Select the example repository just created on GitHub.com, then click the Clone button:
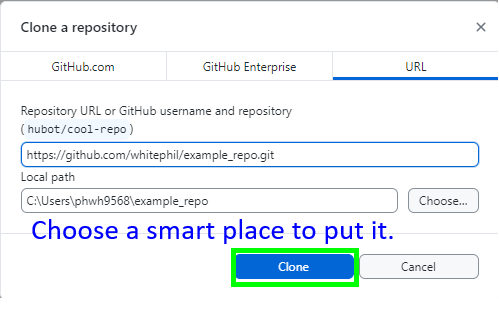
Step 3
In the Clone dialog box, choose URL, then select a destination folder. Be smart about where you save it… Click Clone:
Now you’ve downloaded the remote repository to your local machine.
Committing changes.
Step 1
- Use the File Explorer or Finder app to navigate to the directory holding your repository.
- Then create a new file:
newFile.txt. - Open the file, add a line with some text, and click save.
Back in GitHub Desktop, note that changes to the files are tracked: 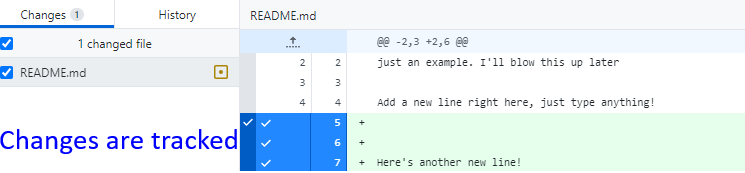

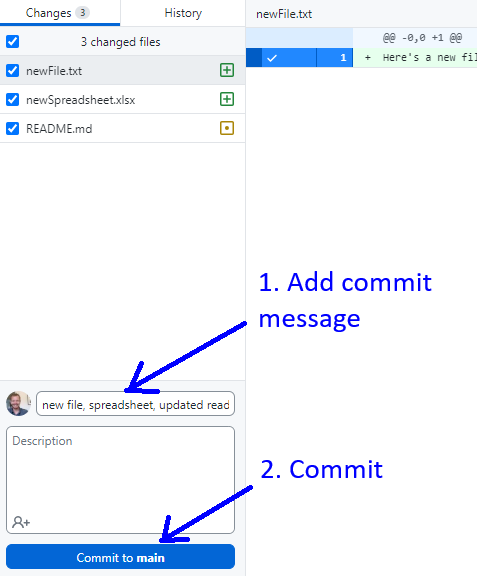
Step 2
- Select the files you want to add commit changes to.
- Add a commit message
- Click commit
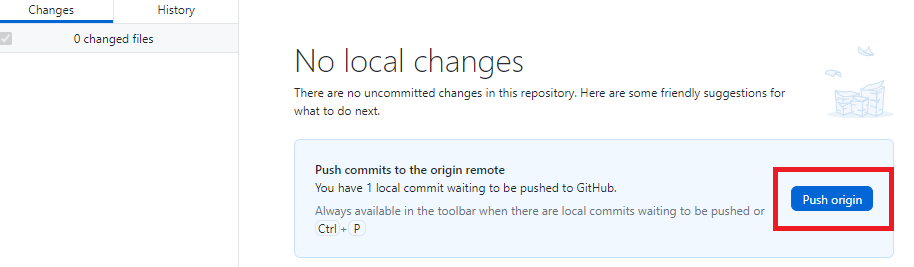
Push changes to the remote repo on GitHub
Step 1
Just click Push Origin!
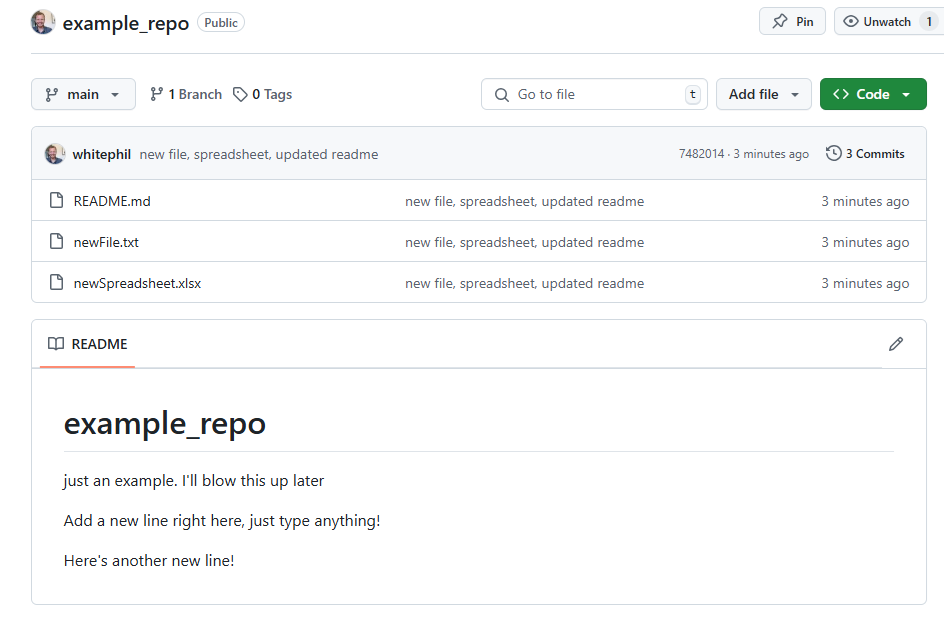
Now, back on GitHub, the new files have been backed up and tracked.
Pulling remote changes to the local repo:
Often, changes are made to the remote, either by you on GitHub.com, or by a collaborator.
Step 1
As we did before, navigate to the remote repo on GitHub.com and commit a change to one of the files.
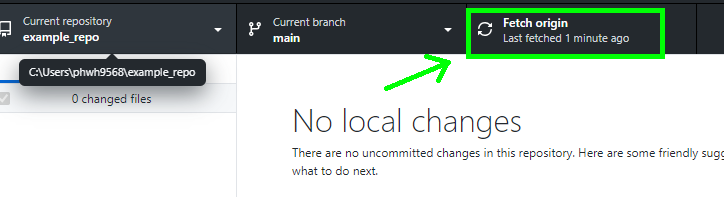
Step 2
Back on GitHub desktop, click Fetch Origin:
Step 3
Now, simply press the Pull Origin button:
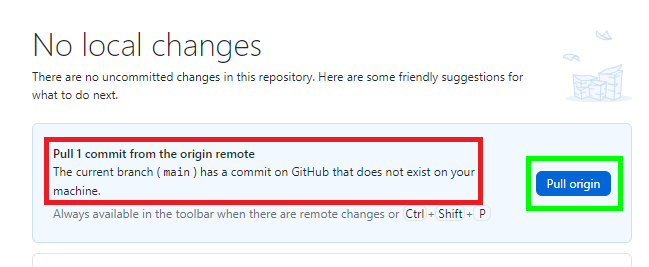
Congrats! You’ve pulled remote changes down to your local repo!
Command line workflow:
All of the above can be accomplished with the command line as long as you have Git installed. This is actually the more common workflow. If you’re on Windows, the GitBash terminal/command interface comes with Git. On Mac, you can use the terminal app. Here is a basic example:
Cloning the repo:
Step 1
On your repository page on GitHub, click the Code button:
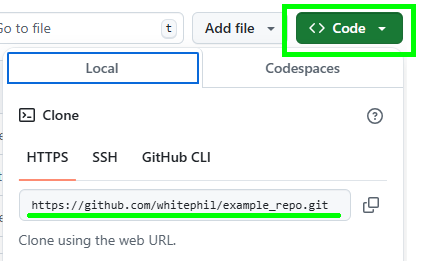
You’ll need this URL.
Step 2
- Now open your preferred terminal/command line interface, such as GitBash.
- Enter the command:
git clone https://github.com/username/repo_name.git. - Of course, replace the
usernameandrepo_namewith the actual ones.
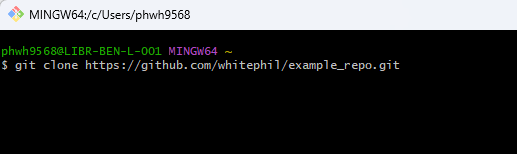
Upon completion, the remote repo will now be downloaded to your local machine.
Committing and pushing from the command line:
Step 1
- Next, modify any file in the repo as we did previously.
- Enter the
git statuscommand to see all modified or new files yet to be committed to the repo.
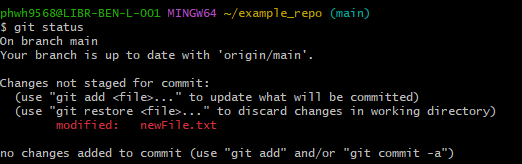
In this example, you can see newFile.txt has been modified, but is not being tracked.
Step 2
- Use git add to add newFile.txt:
git add newFile.txt - This “stages” the change, but does not yet commit. Think of this as clicking the check box as you do using the desktop app.

- Now use
git statusagain to see files ready to commit:
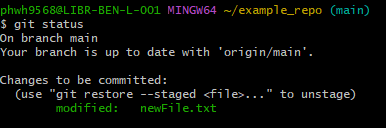
Note the file is now green. It is ready to commit. - Now we will commit. You MUST add a commit message, like this:
git commit -m 'added a line to newFile.txt'
The-mis the “message flag”
Your changes are now committed.
Step 3
Finally, we will push the changes to the remote repository on GitHub using: git push origin main
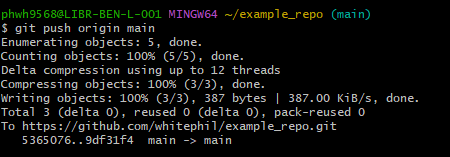
Done! Go take a look at your remote repo and you’ll see the changes have been pushed.